

Learn 2GROW Series: Propagation 101, Topic: Cloning
- By cloning we can assure that we are growing only the best genetics. We can also use selective breeding to better a plants’ genetics over time naturally.
- Cloning also allows us to choose which sex of a plant we want to reproduce.
- Free Plants! I mean come on, who can argue that.
- The major difference between a clone and a germinated seed is that germinated seeds have a tap root. This will affect your yield however for indoor growing it will not be a make or break difference, especially if you are a new grower.
- Nodal spacing is not as symmetrical like you would find on a germinated seed.
- Most people get pests or powdery mildew by accepting a friends' clone.
- If your considering taking some clones from a friend please see, IPM: Preventative Measures (Specifically bulletin #2 Trust no one)
- Cutting implement, other tools
- Humidity Dome/Tray
- Your Hands
- The area you are cloning (we just put down clean paper towels)
- Ideally use R/O filtered water, and don't forget to disinfect the cup.
- Wash component with warm water and soap.
- Dry completely with clean cloth (or what we do, just let it air dry)
- Apply isopropyl alcohol and allow to air dry (do not use a cloth)
- Foliage with the deepest or "richest" shade of forest green.
- Short nodal spacing (the spacing in between the nodes, the shorter or "tighter" the better
- Stress resistance
- If you missed watering and noticed one plant didn't seem to mind as much as the others.
- If you did plant training and noticed one didn't get as stressed out as the others.
- If all but one plant got mold in your environment, you know that one plant is mold resistant
Information posted here was taken from our most recent (free) grow class Propagation 101.
To see when this free grow class is available again check our 2019 class schedule.


Cloning 101
Why Clone?
Plants are just like people! Even when two people “breed” the offspring’s genetic traits aren’t consistent.
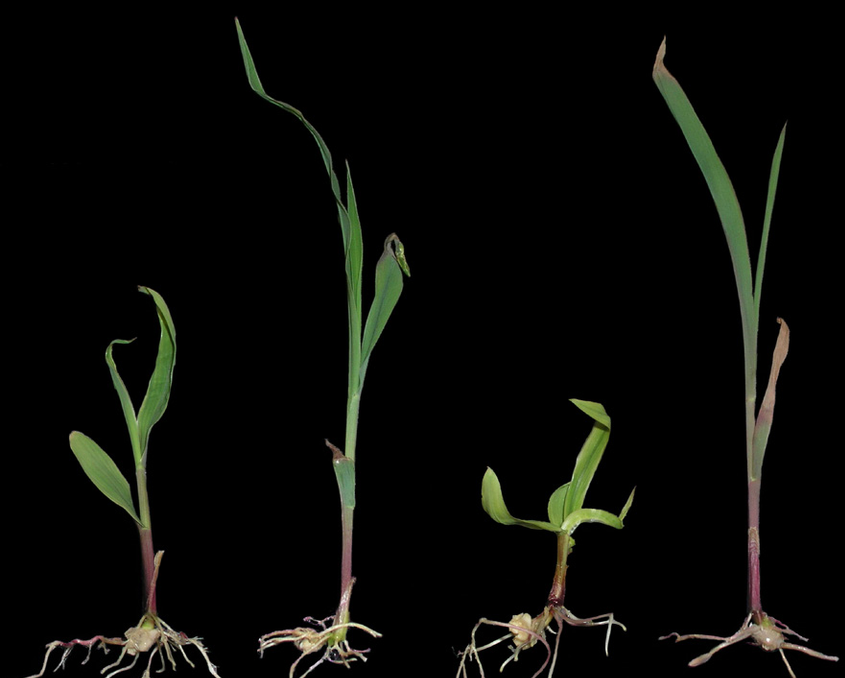
Out of these 4 grass seeds (from the same mother plant) you can see one of them (far right) has all the positive traits we want without any other mutations we don't.
Pros
Cons
Before we break down how to clone, we want to reeeaallllyyyy emphasize...
Cleanliness is the KEY to Cloning
Even if you buy the fanciest cloning machine on the market if you do not take cleanliness seriously you wont get good results cloning. (You've Been Warned!) This is the difference between 2/10 (20% success rate) rooting clones and 8/10 (80% success rate) rooting clones.
This stands for any type of cloning, soil, hydro, aeroponic systems, any.
How To Clone
Prep Work
Disinfect anything will make contact with the clone...anything
Not sure how to Disinfect?
Set your work station
-
When cloning the second bigger concern after cleanliness is
time in between. From the second you cut the clone off the plant to the second you put the clone in the new media to root. Keeping the "time in between" to a minimum is important because the longer the "open wound" (where you cut) is exposed to an environment to more likely it is going to be contaminated.
This is why setting your workstation up with everything disinfected prior is so important.
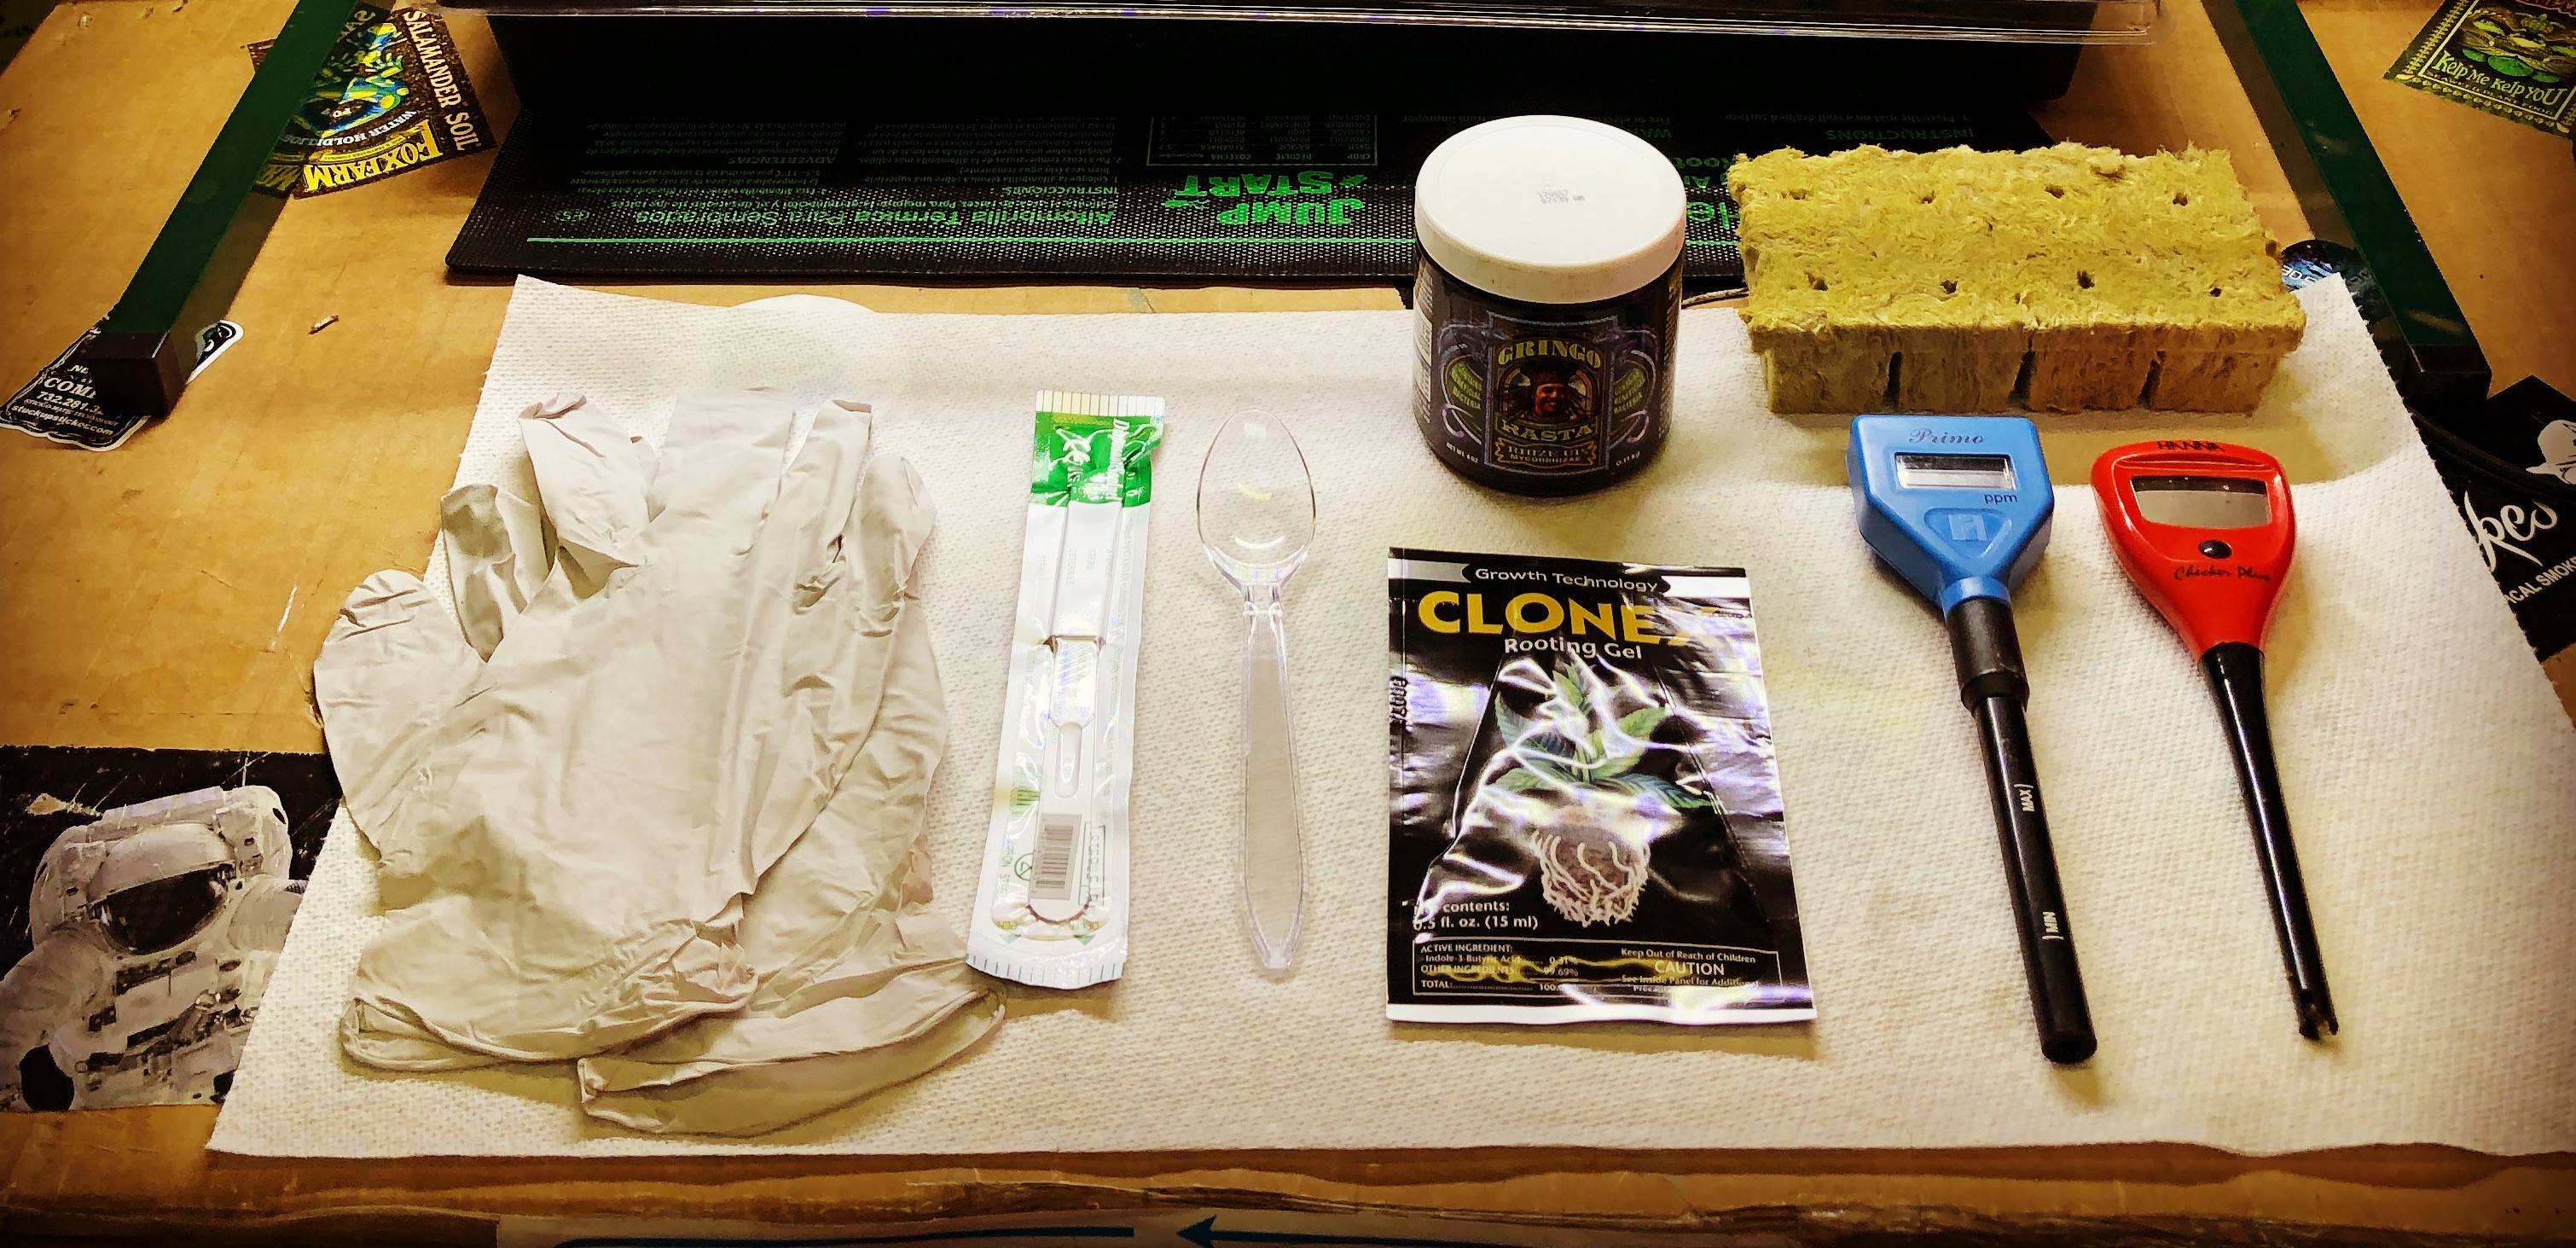
#GrowFamProTip: Use a spoon for your cloning solution and microbes. This way if your clone is contaminated, you won't be contaminating all of your cloning gel.
Choosing your "Mother plant"
-
You've probably seen it yourself, some plants simply just don't grow as well as their brothers and sisters. Runts of the litter or genetically inferior, whatever you want to call it, they are not the plants we want to reproduce (or grow). As a beginner these are the generally speaking the traits you want to look for during your growing process in anticipation of cloning.
Cut, cup, prune, swirl, dip, dip, media
Cut suckers or the newer growth on the end of a branch. Your looking for roughly 7 inches.
Suckers and new growth are pre genetically inclined to root faster. With tomatoes, suckers should be pruned anyway.
1. Cut with the sharpest (sterilized) knife you can find on a 45 degree angle.
At this angle the largest amount of cell membrane (space the new roots grow from) is exposed.
Make the cut in one swift motion.
The worst thing you can do is "saw" the knife back and forth, this results in torn cell membrane not cut. Torn membrane does not grow roots.
2. Place the new cut clone immediately in a cup of pH balanced water
Special shout out to Matt Carroll Imagery for shooting this month's class (and making us that cool new intro)
3. Prune
If there are 7 leafs on the branch, you'll want to remove 3 of them depending on preference maybe even more. The extra foliage will require nutrients and water to keep alive. By removing them instead of keeping them the clone will not wasting nutrients growing foliage. It will use the energy instead to grow new roots faster.
The remaining foliage cut the tips off, this will also stop the clone from growing the foliage and focus on roots.
4. Swirl the clone in the cup before you remove it from the water
This knocks off any air bubbles that could of gotten caught in the cell membrane, which would inhibit roots from growing. This is why we put it in the water in the first place.
4 . Dip into rooting hormone
5. Dip into microbe product (mychorrzhea)
This will greatly increase root growth.
6.Place into media
Media can be soil, rock wool, peat, coco fiber, whatever floats your boat.
Now all you need to do is keep those clones moist and not wet, just like germinating seeds. Having a high humidity is vital inside the clone dome.If you want to give them a boost you can do so by applying foliage sprays with very low amount of nutrients (under 200 PPM). This helps because without roots, through foliage is the only way the clones can absorb nutrients. Typically we use water on the cuts for the first days (using a spray bottle to keep the media/dome moist) then when roots start to grow we add nutrients.
It can take anywhere from 6-12 days for a clone to start growing new roots depending on the genetics, your skill level, and if your using an aeroponic cloner or not.
To Learn How to prevent pests in your garden by checking out our blog post about preventative measures and Integrated Pest Management
If you would like to contribute to this #Learn2GROW blog post about Spider Mites with tried and trued methods (#Growfam Pro-tips) please contact doug@shoregrow.com (and thank you)
Recent Posts
-

A Brief Overview of Grow Light Maintenance
Growing plants indoors requires efficient tools and great dedication. If the grow lights are produci …Apr 19th 2024 -

4 Important Benefits of Hydroponic Gardening
The traditional approach of gardening is taking a backseat to hydroponics. Rather than growing in so …Mar 26th 2024 -

4 Telltale Signs of Mildew on Cannabis Plants
One of the biggest antagonists to growers is mildew. Plants stuck in environments with high humidity …Feb 22nd 2024